
The only official, free channel to book an Italian consulate appointment in the United States is the Italian Ministry of Foreign Affairs’ Prenot@mi portal. No third-party service, paid platform, or bot can legitimately secure a slot for you. Start here, right now, with three steps:
- Identify your consulate. Your residential address determines which Italian consulate has jurisdiction over your case.
- Create or log into your Prenot@mi account. Registration is free and requires a valid email address.
- Select your service category and book a slot. Choose the correct appointment type (visa, passport, citizenship) and confirm your reservation.
Key U.S. consulate portals you will use: the Embassy of Italy in Washington (Ambasciata d’Italia a Washington), the Consulate General of Italy in Los Angeles (Consolato Generale d’Italia a Los Angeles), the Consulate General of Italy in New York (Consolato Generale d’Italia a New York), and the e-Application visa portal (e-applicationvisa.esteri.it) for visa form submission.
Key Takeaways
Booking an Italian consulate appointment in the U.S. requires the official Prenot@mi portal, the correct consular jurisdiction, and active confirmation within the consulate’s specified window.
| Point | Details |
|---|---|
| Use Prenot@mi only | The official portal at prenotami.esteri.it is the only free, authorized booking channel. |
| Verify your jurisdiction first | Your state of residence determines which consulate handles your case; wrong-jurisdiction bookings are canceled. |
| Confirm within 3–10 days | Log back into Prenot@mi and confirm your slot within the consulate’s window or lose it automatically. |
| Visa window is several months | You can book a visa appointment up to several months before your intended travel date. |
| Roots Recovered, LLC prepares your file | The firm handles document research, application review, and interview coaching so you arrive at your appointment ready. |
Table of Contents
- Which Italian consulate covers your address?
- How to register and verify your Prenot@mi account
- How to choose the right service category in Prenot@mi
- How to pick a date and complete your Prenot@mi booking
- How to confirm, cancel, or reschedule your appointment
- What documents and payment to bring to your appointment
- Day-of checklist: what to expect at the consulate
- Common Prenot@mi problems and how to fix them
- How Roots Recovered, LLC supports your consulate preparation
- Sources
Which Italian consulate covers your address?
Your consular jurisdiction is determined by your state of residence, not your citizenship or birthplace. Each Italian consulate in the U.S. covers a defined set of states, and booking an appointment at the wrong consulate is a common mistake that can result in cancellation. The Embassy of Italy in Washington and the consulates in New York, Los Angeles, Miami, Chicago, Houston, Boston, Philadelphia, San Francisco, and Detroit each cover specific states.
To confirm your jurisdiction:
- Visit the official website of the Italian consulate you believe covers your state and look for the “consular district” or “jurisdiction” page.
- Cross-reference with the Italian Ministry of Foreign Affairs’ consular network directory.
- Check your zip code and state against the consulate’s listed coverage area.
- If you recently moved, contact the consulate by email (addresses are listed on each consulate’s official page) to confirm which office now handles your case.
Consulate notices consistently warn that appointments booked by residents outside the correct jurisdiction may be canceled. For special visa categories such as elective residence or digital nomad visas, some consulates require you to contact the Visa Office directly before booking.
Pro Tip: If you recently moved across state lines or are temporarily living abroad, email the consulate before booking. Jurisdiction disputes are one of the most common reasons appointments get canceled after the fact.
For families booking citizenship appointments for children, the dual citizenship process for minors has specific jurisdiction rules worth reviewing before you proceed.
How to register and verify your Prenot@mi account
Every applicant needs a Prenot@mi account before booking. The registration process is straightforward, but a few details trip people up.
- Go to prenotami.esteri.it and click “Register.”
- Enter your email address, create a password, and fill in your personal data exactly as it appears on your passport or ID.
- Submit the form. The system sends a one-time password (OTP) to your email for verification.
- Check your spam or junk folder immediately if the OTP does not arrive within a few minutes. Passport booking pages note that OTP confirmations are mandatory for actions in Prenot@mi, so a missed code blocks your progress.
- Enter the OTP to activate your account. Save your login credentials somewhere secure.
- Log in and verify that your name in the account matches your legal name exactly. The account name must match the applicant’s name on official documents.
For minors, a parent can often book using their own account while listing the minor’s details. For multiple adults in the same family, separate accounts are the safest approach to avoid name-matching errors.
Pro Tip: Use a dedicated browser session or private/incognito window when booking. Some users report session timeouts that drop a slot mid-booking. Save your confirmation email and screenshot the reservation code the moment it appears.
How to choose the right service category in Prenot@mi
Selecting the wrong appointment category is one of the most avoidable mistakes in the Italian consulate appointment process. An incorrectly categorized booking can result in a rejected or inadmissible application at the window.
Common service categories you will see in Prenot@mi include:
- Schengen/short-stay visa (type C): for tourism, business, or family visits up to 90 days
- Long-stay/national visa (type D): for study, work, family reunification, or elective residence
- Passport renewal: for Italian citizens renewing an expiring or expired passport
- Passport first issue: for Italian citizens who have never held an Italian passport
- Citizenship recognition appointment/interview: for applicants pursuing jus sanguinis (citizenship by descent) claims
- Affidavits, legalizations, and other consular services: for document authentication and declarations
Service label wording can vary slightly between consulates. The Consulate General in New York may phrase a category differently than the one in Los Angeles. Always read the category description on your specific consulate’s Prenot@mi page before selecting. If you are booking a citizenship by descent appointment, confirm whether your consulate lists it as “citizenship recognition,” “cittadinanza,” or another label. A citizenship eligibility assessment can help you determine which category applies to your case before you log in.
How to pick a date and complete your Prenot@mi booking
Once your account is active and your service category is confirmed, the actual booking takes only a few minutes, provided slots are available.
- Log into Prenot@mi and select your consulate from the dropdown menu.
- Choose your service category.
- The calendar will display available dates. Select a date and then a time slot.
- Enter the applicant’s details as prompted (name, passport number, contact information).
- Review the summary page carefully before submitting.
- Submit the booking and immediately save or print the confirmation code. You will need this code to confirm, modify, or cancel the appointment later.
For visa applications, you can schedule a consulate visit up to 180 days before your intended departure date. Passport bookings at some consulates, including Miami, have a limited booking window including a period close to three months from portal access. If you are also submitting a visa application form, complete it on the e-Application visa portal before your appointment so you can print and bring the signed form.
New slots commonly release at midnight Rome time, though the exact schedule varies by consulate. Checking the portal at that hour, or early in the morning U.S. time, gives you the best chance of catching fresh availability.
Pro Tip: If no slots appear, scroll to the waiting list option and add your name. The Consulate General in New York confirms that the system notifies you automatically when a slot opens. Enable email notifications and check your inbox frequently.
How to confirm, cancel, or reschedule your appointment
Booking a slot is not enough. Most consulates require you to actively confirm your appointment within a specific window, or the system cancels it automatically.
- Confirmation window: Consulates typically require confirmation between 3 and 10 days before the appointment date. The Embassy of Italy in Washington specifies that applicants must confirm within this window, with some offices enforcing a hard deadline of no later than 3 days before.
- How to confirm: Log into your Prenot@mi account, locate your booking, and click the confirmation option. The system sends an OTP to your email to complete the action.
- How to cancel: Access your booking in Prenot@mi and select the cancellation option. The Prenot@mi user guide explains how to cancel appointments, remove yourself from a waiting list, and print reservation details from your account.
- How to reschedule: Cancel the existing appointment first, then rebook. There is no direct “reschedule” button; canceling and rebooking is the standard process.
- Removing yourself from a waiting list: Use the same account dashboard to withdraw from any waiting list you joined.
Official consulate notice: Booking an Italian consulate appointment is free. Any third-party service that charges a fee to secure a Prenot@mi slot is unauthorized. Appointments obtained through paid services or bots will be canceled and may be reported. Use only the official portal at prenotami.esteri.it.
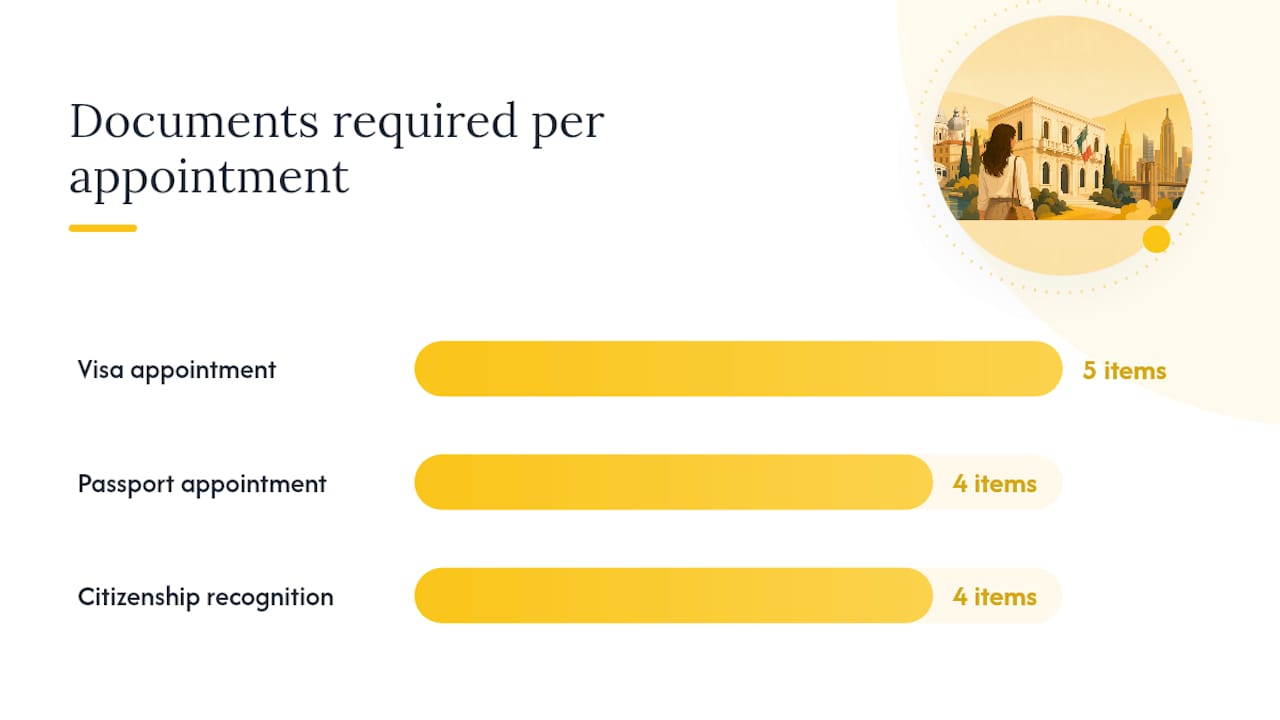
What documents and payment to bring to your appointment
Arriving without the right documents means a wasted trip. Requirements vary by service, but the structure is consistent across U.S. consulates.
Visa appointments (short-stay or long-stay):
- Completed and printed e-Application form, signed in front of the Visa Officer
- Valid passport (original plus copies of the photo page)
- Two recent passport-size photos
- Proof of travel itinerary, accommodation, and financial means
- Applicable visa fee payment in the consulate’s accepted format
Passport appointments (renewal or first issue):
- Current or expired Italian passport (original)
- Valid government-issued photo ID
- Two recent passport-size photos
- Printed appointment confirmation
Citizenship recognition appointments:
- Birth and marriage records tracing your lineage (originals and certified copies)
- Proof of residence in the consulate’s jurisdiction
- Any affidavits or declarations required by the consulate (see guidance on affidavits in citizenship applications)
- Printed appointment confirmation
Payment methods: Consulates commonly accept money orders or cashier’s checks made payable to the consulate. Cash is accepted only with prior authorization at some offices. Always verify the accepted payment methods on your specific consulate’s page before your appointment, as these details change and vary by location.
Print every online form and bring both originals and photocopies of all documents. Consulate staff will instruct you to sign certain forms in person.
Day-of checklist: what to expect at the consulate
Plan to arrive 10–15 minutes before your scheduled time. Italian consulates operate by strict appointment schedules, and late arrivals may be turned away.
- Bring your printed confirmation code (paper copy, not just a phone screen).
- Carry valid photo ID and your passport (original plus copies).
- Have all required documents organized and separated by type.
- Bring your payment in the correct form (money order, cashier’s check, or cash if pre-authorized).
- Dress neatly. Consulate offices are formal government spaces.
At the window, a consular officer will verify your identity, review your documents, and may ask brief questions about your application. For visa appointments, you will sign the e-Application form in front of the officer. For citizenship interviews, the officer may ask you to confirm details about your lineage or the documents you have submitted. Understanding what happens at a citizenship consulate interview in advance reduces uncertainty on the day.
If you are booking for multiple family members, check whether your consulate allows multi-person bookings under a single slot. Most do not, so each adult applicant typically needs a separate appointment.
Common Prenot@mi problems and how to fix them
No availability is the most frequent complaint, and it has practical solutions.
- No slots showing: Clear your browser cookies or switch to a different browser. Session data sometimes causes the calendar to display incorrectly.
- OTP not received: Check your spam folder first. If it still does not arrive, try re-registering with a different email address or contact the consulate’s administrative email.
- Account name mismatch: Your Prenot@mi account name must match your legal name exactly. If it does not, create a new account with the correct name rather than trying to edit the existing one.
- Appointment canceled by the consulate: This usually happens due to a jurisdiction mismatch or an unconfirmed booking. Contact the consulate by email immediately to explain your situation and ask about next steps.
- Waiting list not triggering notifications: Confirm that the email address on your account is correct and that consulate emails are not being filtered.
Consulate pages consistently advise that checking the portal multiple times per day and monitoring for cancellations is the most reliable way to secure a high-demand slot. Some consulates add new slots on a weekly basis, often on a specific morning. Learning your consulate’s release pattern is more effective than any paid workaround.
Pro Tip: Set a recurring reminder to check Prenot@mi at midnight Rome time (6 PM Eastern / 3 PM Pacific) and again first thing in the morning. Canceled appointments from other applicants reappear in real time, and those slots fill within minutes.
How Roots Recovered, LLC supports your consulate preparation
Navigating the Prenot@mi system is manageable once you know the steps. The harder part, especially for citizenship by descent applicants, is arriving at that appointment with a complete, correctly assembled file that gives your case the best possible outcome.

Roots Recovered, LLC specializes in exactly that preparation. The firm offers eligibility assessments, document research and collection, application review, and consulate interview coaching for individuals and families pursuing Italian citizenship by descent. Every client receives personalized guidance on which documents to obtain, how to organize them for the consulate’s review, and what to expect during the interview itself.
Roots Recovered, LLC does not purchase, procure, or pay for Prenot@mi appointments. The firm prepares you to use the official portal correctly and to walk into your consulate appointment ready. That distinction matters because a well-prepared applicant avoids the delays and resubmissions that cost months of waiting.
To find out whether you qualify and what your file needs, start with a citizenship by descent services consultation with Roots Recovered, LLC.
Sources
These are the pages you will return to most often as you schedule your Italian consulate visit, check slot availability, and verify consulate-specific rules.
- Appointments for Consular Services / Citas para servicios consulares – Consolato Generale d’Italia Miami
- Book an appointment – Ambasciata d’Italia a Washington
- Book an appointment – Consolato Generale d’Italia a Los Angeles
- General Information – Consolato Generale d’Italia a New York
- Prenot@mi – Consolato Generale d’Italia Miami
- Prenot@Mi user guide (Consulate PDF guide)
Check your local consulate’s page regularly. Slot release schedules, confirmation deadlines, and accepted payment methods are updated without advance notice, and the consulate’s own page is always the authoritative source.